
I recently decided to brush up on my navigation skills and took a training course run by my hiking club.
The first part of the course was in a classroom, where we covered topographic maps, their features, and how to read them. (I’ve written a blog post about that—check it out here!) We also learned how to use a compass in conjunction with a map to navigate from point A to B. All great in theory, but the real test comes in the bush—enter the Mount Murray Anderson navigation training hike.
After reviewing our maps, we determined the best route: following a marked fire trail before heading off-track at the ridgeline, where the terrain would be flatter and more manageable.
Mount Murray Anderson Hike Overview
- When: 22 March 2025
- Where: Ku-ring-Gai Chase National Park
- Weather: A warm autumn day. Low of 68°F (20°C) and a high of 73.4°F (23°C)
- Departure: From Bulara St, Duffys Forest return
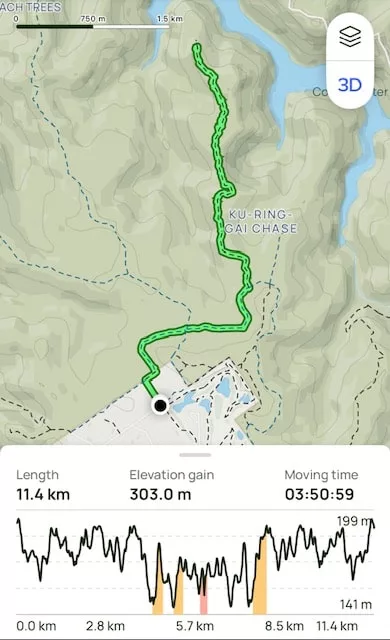
- Length: 7.08 miles, 11.4 km
- Elevation gain: 994 ft, 303 m
- Duration: 3 hours 50 minutes moving time
The Start
We met near Duffy’s Forest, on the edge of Ku-ring-Gai Chase National Park. A group of kangaroos stood on the road, watching us from a distance—what a great way to start the day!
With maps in hand and compasses ready, our first task was to get our bearings, orient our maps, and confirm the direction we were heading. This was easy at first, as we followed a road. We also discussed an important navigation principle: the average walking speed for hikers is around 4 km per hour.
Before long, we reached a fire trail, which we quickly identified on the map. The signpost made it an obvious turn-off!
As we continued, we estimated when we’d need to leave the fire trail and head off-track. Based on our walking pace and the map’s contour lines, we guessed about 15 minutes. Along the way, we compared the topography on the map with the actual landscape around us, reinforcing our understanding of how the two matched up.
Heading into the Bush
As we approached our turn-off point, we stopped to check our bearings. Navigating with a map and compass requires regular stops to confirm you’re still on the right path.
Sure enough, near us was a faint entry point—a footpad. A footpad is an unmarked track created over time by foot traffic, either from hikers or animals (wombats, in particular, are great at making them). Since these tracks aren’t maintained, they can become overgrown and tricky to follow.
Using Map and Compass to Set Our Course
Now came the real test: using our compass and map to set our direction of travel.
First, we identified our next destination on the map—the trig point at Mount Arthur. Sticking to the ridgeline would help us avoid the steep slopes on either side, as indicated by the closely packed contour lines.
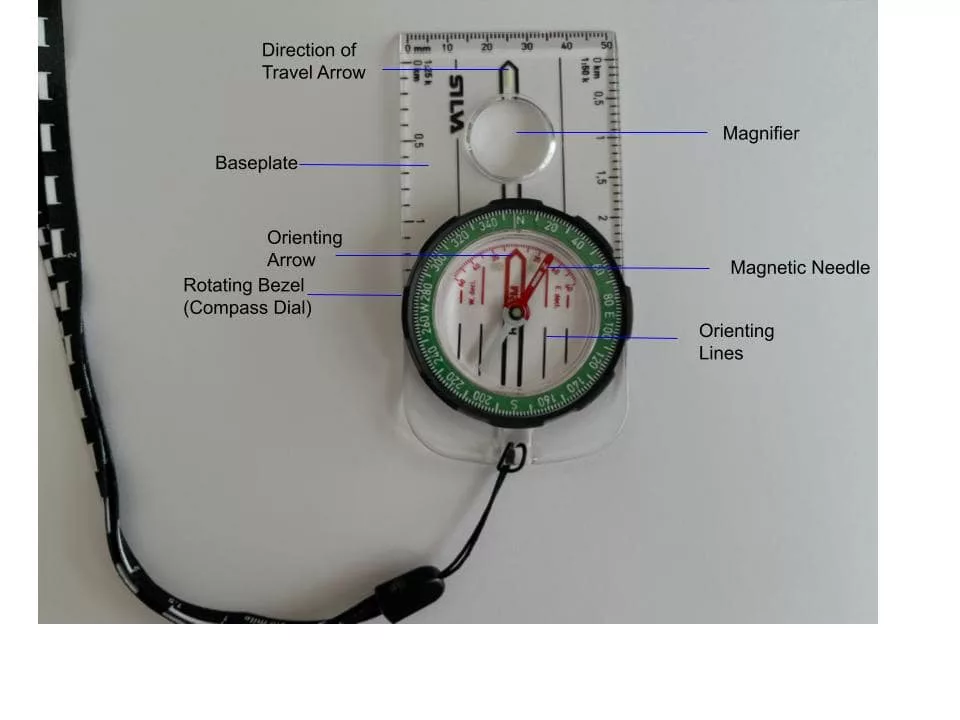
We laid the map flat and aligned the edge of the compass between our start and endpoint. Next, we rotated the compass bezel until its directional lines matched the north-south grid lines on the map. Then, we adjusted for magnetic declination by rotating the bezel 12 degrees east, as noted on the map.
With that set, we turned until the red compass needle sat inside the directional arrow on the compass’ face. As I like to say, “Get your red in the shed!” The black direction arrow on the baseplate now pointed in the direction where we needed to go. For a refresher on the parts of a compass – head here.
We also estimated the distance and time to our next stop, factoring in that walking on a narrow, overgrown footpad would be slower than following a maintained trail. The map suggested the vegetation would thin out near the trig point, giving us another clue to confirm our position along the way.
Reaching the Trig and a Break
Once we arrived at the stone trig, we took the obligatory photos before selecting our next bearing. This time, we found a shady spot on some rocks to enjoy a well-earned morning tea while we checked the map and re-setting our compasses with our next destination point – Mount Murray Anderson.

The Harsh Reality of Nature – Love Bites
Navigation aside, the bush had its own surprises.
This little-used footpad was draped with orb-weaver spider webs, stretching across the track like suspension bridges. We paused to observe a large female in her web—just in time to see a much smaller male approach and mate with her. Then, in an instant, she killed him. Nature is brutal!

Rockier Terrain and Ancient History
As we neared Mount Murray Anderson, the landscape became rockier, with less vegetation. We stopped to admire ancient Aboriginal rock carvings and used them as a reference point to check our position on the map.
Lunch with a View
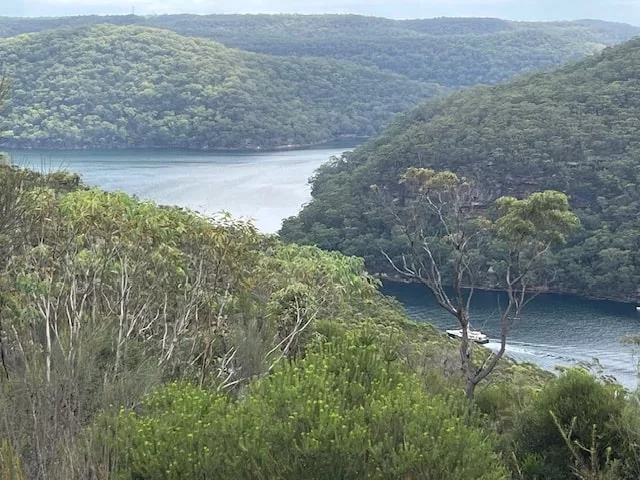
Before long, we reached Mount Murray Anderson, where the footpad led us to a natural rocky lookout with a stunning view over Smiths Creek. The perfect lunch spot!
The Return
Before heading back, we used our maps to identify distant peaks and landmarks. Retracing our route, we double-checked our compasses to ensure we weren’t thrown off by traveling in the opposite direction—a common mistake in navigation.
My Final Thoughts
This was a fantastic hike for practicing map-and-compass navigation. The footpad provided just enough guidance to ease first-time navigators into off-track hiking while still requiring us to rely on our skills.
One big takeaway: I’ll definitely be carrying a map and compass on all my hikes from now on! Happy Hiking.
Have you ever tried navigating with a map and compass? You can share your thoughts or ask questions below.