
Hiking for me, is an immersive experience where I connect with nature, discover breathtaking landscapes, and create unforgettable memories. I like to capture those moments along the way? Discover the benefits of hiking here.
With the right tips and techniques, you can turn your hiking adventures into beautiful photos that tell a compelling story of your journey. Whether you’re an amateur photographer or just using your phone, these simple tips on how to take nature photos will help you take your hiking photos to the next level.
I’m going to give a full disclaimer here. I am not a photographer but am interested in sharing imagery of my hikes with you. I use an iphone to take photos as I don’t want to carry a bulky camera when hiking, as it becomes another piece of equipment to worry about. I like to keep it simple and enjoy nature and my surroundings.
By using the tips I give here, I can see that my photography skills have improved.
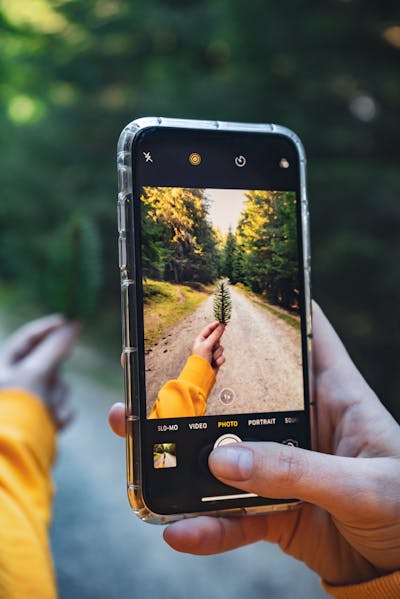
Make Use of Leading Lines
One of the most powerful compositional tools in photography is leading lines. Lines naturally draw the viewer’s eye toward a subject and create a sense of movement. Hiking trails, rivers, roads, and even cliffs can make excellent leading lines. For instance, a trail that curves off into the distance can guide the viewer’s attention to a solo hiker, making them the main focus of the photo. Next time you’re out hiking, look for natural lines and use them to frame your shot.
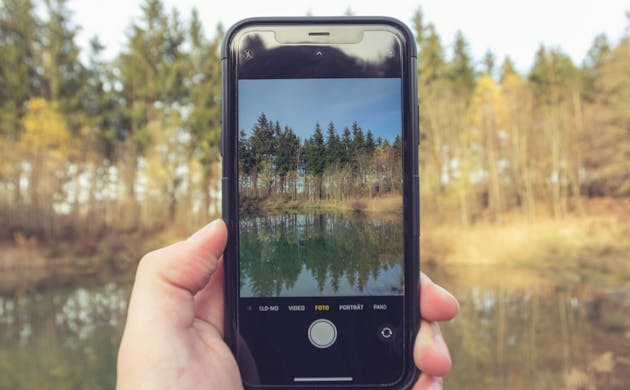
Capture Depth: Foreground, Middle Ground, and Background
To add dimension and interest to your hiking photos, include elements in the foreground, middle ground, and background. Think about how objects like rocks, trees, or a lake can add layers to your shot. For example, you could frame a scenic mountain view by placing a branch or rock in the foreground. Experiment with blurring certain areas (foreground, middle ground, or background) using portrait mode or in post-editing to create a more professional look.
Change Your Perspective
It’s easy to get stuck in the habit of shooting from eye-level, but changing your perspective can completely transform your photos. Try different angles like bird’s-eye (shooting from above) or worm’s-eye (shooting from below) to create a fresh perspective. Also, getting up close to your subject can make your shots feel more intimate, whether it’s a wildflower along the trail or a fellow hiker taking in the view.

Use the Rule of Thirds
One simple rule that can instantly improve your hiking photography is the Rule of Thirds. Imagine dividing your frame into nine equal parts with two vertical and two horizontal lines. Position important elements of your photo along these lines or at their intersections. Most phones now come with an in-built grid to help with this. Using the Rule of Thirds will create more balance and visual interest, leading to a more compelling image.

Shoot During Golden Hour
Lighting plays a crucial role in creating stunning photos. For the best results, try to take your hiking photos early in the morning or later in the day, when the sun is lower in the sky (known as “golden hour”). The light during this time is softer and warmer, resulting in beautiful, long shadows that can add a magical effect to your landscapes. Avoid harsh midday light, which can create harsh shadows and overexposed areas.
Taking photos during various weather conditions helps to capture the mood of your hike. Misty mornings, rainy days, or dramatic sunsets can dramatically alter the feel of your photos.

Adjust Your Exposure
If your photos are too bright or too dark, it may be due to improper exposure settings. Before you snap your photo, take a moment to manually adjust the exposure on your phone. Most smartphone cameras allow you to tap and slide your finger on the screen to make this adjustment. Getting your exposure right will ensure that your photos are properly lit and clear.
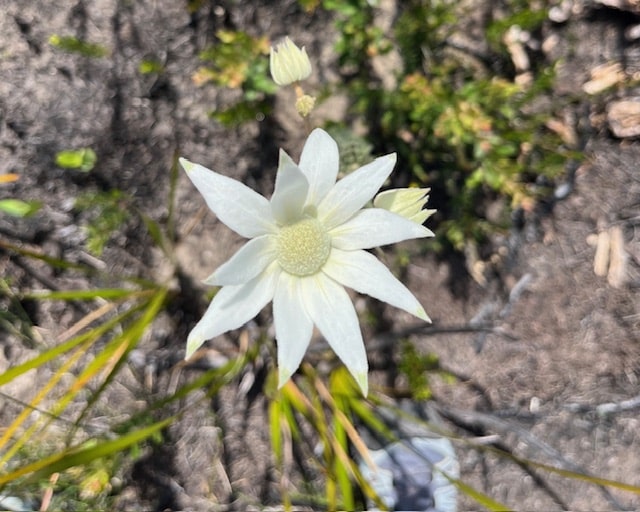
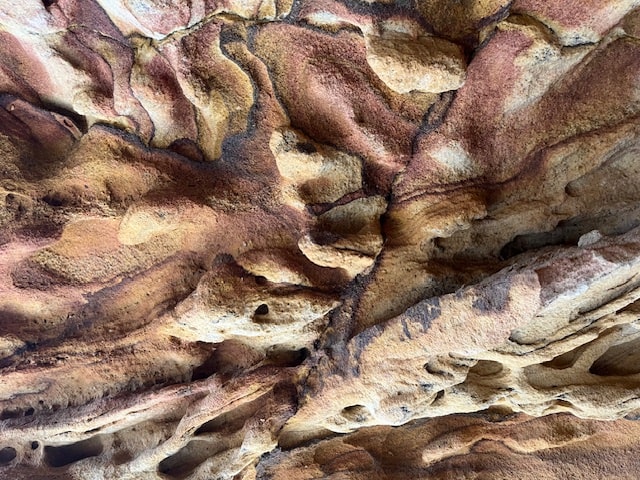
Look for Textural Details
Focus on the textures around you — the rough bark of a tree, the soft petals of a wildflower, the pattern and surface of eroded rocks, or the smooth stones of a stream. These close-up shots help viewers appreciate the intricacies of nature. Once you become aware of doing this your eye sees patterns in nature, enhancing your overall hiking experience.


Stabilize Your Camera
While hiking, it can be hard to keep your phone steady, especially when you’re on the go. A phone tripod or a PopSocket can help you stabilize your phone and prevent blurry photos. If you’re capturing the landscape and want to be in the shot, use a remote or timer to ensure a stable image. Stability is key to capturing sharp, professional-looking photos.
Use Burst Mode for Fast-Moving Subjects
Nature is full of fast-moving subjects, from birds flying overhead to animals darting through the trees. To capture these moments, switch to burst mode on your phone. This feature takes multiple photos in rapid succession, giving you a better chance of catching the perfect moment. You can go through the photos later and choose the one with the best action shot.
Capturing shots of any wildlife you encounter along the trail adds a layer of connection to the natural environment and can surprise and delight your viewers.
Edit Your Photos Mindfully
Editing is where you can really enhance your photos. While Instagram filters can be fun, they often over-saturate or distort the colors. Instead, use editing apps like Snapseed or Lightroom to make subtle adjustments. You can tweak brightness, contrast, and saturation to improve your image without overdoing it. The goal is to enhance your photo while maintaining its natural beauty.
Tell a Story with Your Shots
A great set of hiking photos doesn’t just capture beautiful landscapes — it tells a story. Make sure to take a variety of shots during your hike. Capture wide-angle shots of the landscape, close-ups of interesting details (like a flower or rock), and action shots of people hiking. These images will help you tell a story about your adventure and make your photo collection more engaging.
Consider including brief captions or journal-like entries with your photos that express your thoughts and feelings during the hike. This personal touch can resonate with your audience and invite them into your experience.
“Before and After Shots” help to document the journey. Capture moments before starting a tough climb and the euphoric arrival at the summit to illustrate the progression and achievement of your hike. Adding a human and personal touch to your photos is more captivating for your audience.
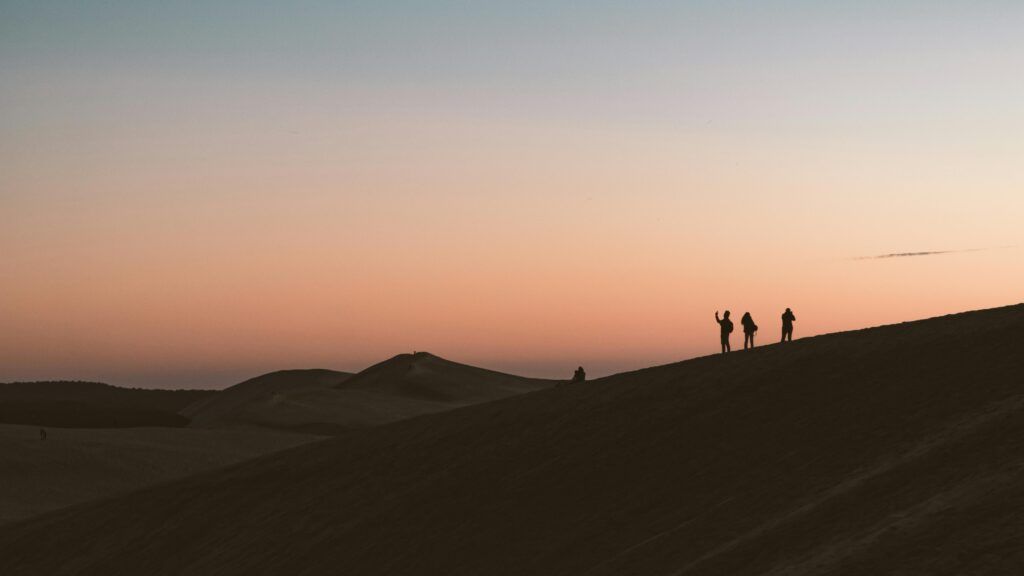
Incorporating Human Elements: Adding Scale and Perspective to Your Photos
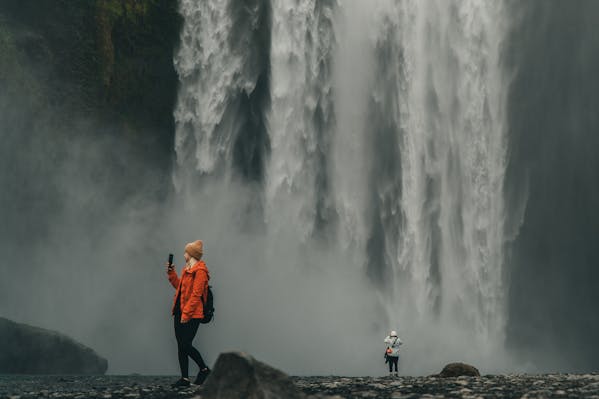
Incorporating human elements into your hiking photos not only adds a sense of scale but also deepens the emotional connection of your imagery. When you include fellow hikers or even yourself in the frame, viewers can better understand the vastness of the surrounding landscapes. Imagine capturing a stunning vista with a small figure gazing out over a sprawling valley or perched atop a rocky outcrop; this juxtaposition emphasizes the grandeur of the environment. Experiment with varying distances, such as framing a hiker against captivating mountains in the background or documenting the moment someone pauses to examine a rare flower. These human elements can transform your photos from simple landscapes into relatable stories of adventure, curiosity, and exploration.
Practice, Practice, Practice
The more you practice, the better your photos will get. Don’t be afraid to experiment with different angles, lighting, and settings. Whether you’re hiking in the mountains or just walking through your local park, there are always opportunities to practice your photography. Review your shots afterward, learn from them, and continue improving.
My Final Thoughts
Photography is a wonderful way to preserve the memories of your hiking adventures. With these simple tips and a little practice, you’ll be able to capture stunning nature photos that truly reflect the beauty of the outdoors. Whether you’re using a high-end camera or just your smartphone, the key is to experiment, play with perspective, and be mindful of light and composition. If you’re interested in a more in-depth explaination of the elemets of a photo, click here. But just with some basics, you’ll see an improvement in your photos. Happy hiking and happy photographing!
Do you have any experience with photographing nature or any questions to ask? Please leave a comment here.
This blog is a great find! I completely relate to the idea of capturing the magic of hiking without the hassle of extra gear. I especially love the advice on using leading lines and changing perspectives. It’s amazing how small tweaks like these make photos feel so much more alive! The tip about practicing during golden hour is another gem, as those soft, warm hues add such a dreamy vibe to landscapes. Thanks for the inspiration to keep experimenting with my phone camera on the trails. Have you tried these tips in different weather conditions too?
Hi Lyn,
This is a fantastic guide for anyone looking to enhance their hiking photography skills! I love how you’ve broken down the tips into simple, actionable steps that even beginners can follow. The emphasis on using a smartphone makes it accessible to everyone, and your personal insights make the post relatable.
Your suggestions, like utilizing leading lines and capturing depth, are excellent ways to make photos more dynamic. I especially appreciate the advice on storytelling through imagery—it adds so much emotional weight to hiking photos. The before-and-after shots idea is brilliant for showcasing the journey and the reward of a hike.
Your practical tips, such as using burst mode and stabilizing the camera, show a thoughtful approach to overcoming common challenges in outdoor photography. Plus, the encouragement to experiment and practice is inspiring for anyone hesitant to start.
Overall, this post is not just a guide; it’s an invitation to explore and share the beauty of nature. Great job! 🌿📸
Cheers
John